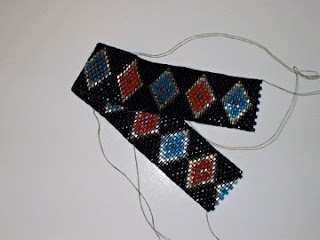
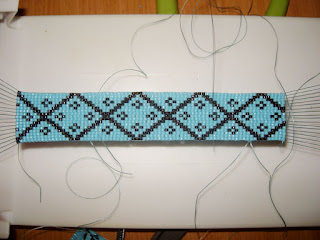
Tutorial Monday: The Square Stitch (Flat)
Square stitch beadwork looks strikingly similar to beadwork made on a loom. For me, working with a loom is faster, but I like the square stitch, too, because you don’t have to work your warp threads (the strings that run the length of the loom) back into your work to hide them when you’re done.
The length of this tutorial might look a little daunting, but the steps are really quite simple. It’s this long because I wanted to show what to do to add a row twice.
A few notes about this tutorial:
1. Add four beads to a string. This will be your first row.

2. Pick up two more beads with the needle. These are beads 2c and 2d.

3. Pass the needle from left to right through bead 1c. Pull it all the way through.

4. Pass the needle from right to left through bead 2c. Pull it all the way through.

5. Pick up one bead with the needle. This will be 2b.

6. Pass the needle from left to right through 1b, then pull your string all the way through.

7. Pass the needle from right to left through 2b, then pull your string all the way through.

8. Pick up one bead. This will be 2a.

9. Pass the needle from left to right through 1a, and pull your thread all the way through.

10. Pass the needle from right to left through 2a, then pull your string all the way through.

11. Pick up two beads with your needle. These are beads 3a and 3b.

12. Pass the needle from right to left through 2b, and pull your thread all the way through.

13. Pass the needle from left to right through 3b, and pull your thread all the way through.

14. Pick up one bead with your needle. This is bead 3c.

15. Pass the needle from right to left through 2c and pull your string all the way through.

16. Pass the needle from right to left through 3c, and pull your string all the way through.

17. Pick up one bead with your needle. This is bead 3d.

18. Pass the needle from right to left through 2d, and pull your string all the way through.

19. Pass the needle from left to right through bead 3d, and pull your string all the way through.

The steps are the same for each additional row. All you need to keep in mind is that you pick up two beads when you turn around.

The length of this tutorial might look a little daunting, but the steps are really quite simple. It’s this long because I wanted to show what to do to add a row twice.
A few notes about this tutorial:
- This is written with a row being four-beads long. All steps, however, are the same for any flat, rectangular work made with the square stitch no matter how long your work is.
- For clarity, rows are labeled 1, 2 and 3, and beads within each row are labeled a, b, c and d. Therefore, row 1 will consist of beads 1a, 1b, 1c and 1d.
- Also for clarity, bead 1a is the first bead on the string, 1b the second, etc., and rows are read from left to right. (For even rows, the first bead on the string will be the "d" bead.) As with any stitch, I have my beadwork in several different positions based on what's most comfortable, so please don't feel you need to hold your work exactly as indicated. What matters is that the stitch goes in the correct direction.
1. Add four beads to a string. This will be your first row.

2. Pick up two more beads with the needle. These are beads 2c and 2d.
3. Pass the needle from left to right through bead 1c. Pull it all the way through.
4. Pass the needle from right to left through bead 2c. Pull it all the way through.
5. Pick up one bead with the needle. This will be 2b.
6. Pass the needle from left to right through 1b, then pull your string all the way through.
7. Pass the needle from right to left through 2b, then pull your string all the way through.
8. Pick up one bead. This will be 2a.
9. Pass the needle from left to right through 1a, and pull your thread all the way through.
10. Pass the needle from right to left through 2a, then pull your string all the way through.
11. Pick up two beads with your needle. These are beads 3a and 3b.
12. Pass the needle from right to left through 2b, and pull your thread all the way through.
13. Pass the needle from left to right through 3b, and pull your thread all the way through.
14. Pick up one bead with your needle. This is bead 3c.
15. Pass the needle from right to left through 2c and pull your string all the way through.
16. Pass the needle from right to left through 3c, and pull your string all the way through.
17. Pick up one bead with your needle. This is bead 3d.

18. Pass the needle from right to left through 2d, and pull your string all the way through.
19. Pass the needle from left to right through bead 3d, and pull your string all the way through.
The steps are the same for each additional row. All you need to keep in mind is that you pick up two beads when you turn around.

Comments
Post a Comment