Peyote Stitch-Odd Count
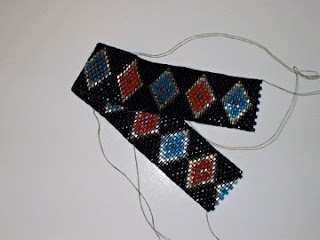
Years ago, I had an idea for a bracelet that called for an odd number of rows in the peyote weave. I was still a newbie at beading, and that was the first time I had worked with an odd-count peyote. It wasn't until I got to the end of a row that I realized the odd-count doesn't work the same as even. None of the books I owned at the time mentioned how to handle the odd count, so I had to Google it. Since then, I've added two books to my bead book stash that have odd-count peyote instructions. The instructions in both books are not only different from each other, but also from the website I found. Rather than include instructions for all ways, I'm just going to outline the one I use most.
Just a couple of notes about this tutorial:
- Like the others I have on this site, these instructions mention working from right to left or left to right, with left being the side of the beadwork that contains the first bead on the string.
- In all illustrations, beads will be numbered according to the order in which they are added to the string.
- For information on how rows are counted in peyote stitch, click here.
1. String an odd number of beads onto the threading material. In our example and illustrations, we'll start off with five beads.

2. Add a sixth bead, then pass the string from right to left through bead No. 4. Add the seventh bead, then pass the string through bead No. 2.

3. Add the eighth bead, then pass from left to right through beads No. 1 and 2.

4. Pass the needle from right to left through beads No. 3, 2 and 1.

5. Pass the needle from left to right through bead No. 8, then add a bead (No. 9), then pass from left to right through No. 7, add a bead (No. 10), then pass from left to right through bead No. 6.

6. Add a bead (No. 11), then pass from right to left through No. 10. Add a bead (No. 12), then pass from right to left through No. 9. Add a bead (No. 13).

7. Pass from left to right through No. 8, then through No. 9. Pass from right to left through No. 2, then from right to left through No. 8.

8. Pass from left to right through bead No. 13. You are now ready to add another row in the same manner as in Step 5.

In this example, turning from a row added from left to right to a row you add from right to left will always be as simple as in even-count peyote stitch. Each subsequent turn from a right-to-left row onto a left-to-right row will require the same steps outlined in Step 7.
Comments
Post a Comment