Posts

Showing posts from 2017

A new light/magnifier for crafts

Image
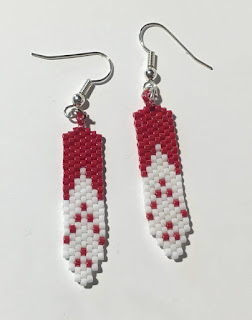
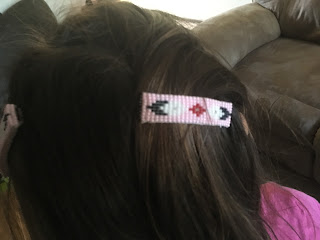
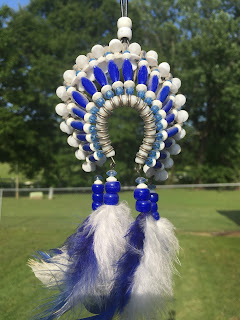
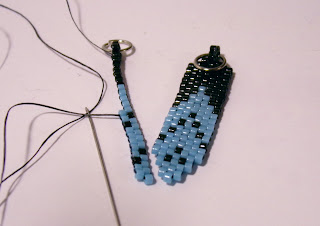
Some of my beadwork is seen through the magnifier on a new floor lamp my husband bought for me. My husband surprised me with a combination light/magnifier that I can use while working on my crafts! How sweet is he? It has a flexible arm that can be positioned however I need it to be. It also stands firmly on the floor, which I love, because every time I've had a light on my table, I've knocked it over or have accidentally knocked it into my beads, which is never a fun cleanup. One section has a stronger magnification than the rest of the glass, which I assume I'll be using a lot as I work with my seed beads. I also love how big the magnification glass is. When I've beaded before, using my reading glasses to see my beads or doing (more often) without glasses altogether, I could only see a small section in detail at once. But this magnifier is big enough to show a large area, making it easier to see how all the pieces fit together. I'm so excited! We

Books: "Making Beaded Jewelry: 11 Free Seed Bead Patterns and Projects"

Image
I got a pleasant surprise while I was looking for books to inspire me recently on Amazon. I found a free e-book that contains 11 patterns. I immediately downloaded it to my Kindle Fire. It's called "Making Beaded Jewelry: 11 Free Seed Bead Patterns and Projects." I haven't had a chance to try to make any of them yet, but in scrolling through it, I can say with certainty that I'll give each a try. As a bonus, at the front page of the e-book are links to free downloads to other craft e-books, including ones with patterns for jewelry making, crocheting, knitting, quilt making and children's crafts, just to name a few. I had no idea there were totally free craft e-books. This little find has made my week. We are a participant in the Amazon Services LLC Associates Program, an affiliate advertising program designed to provide a means for us to earn fees by linking to Amazon.com and affiliated sites.

Beading photography is easier said than done

Image
Over the past few weeks, when I've been away from this blog, I've been struggling to get decent photos of my beadwork for my Etsy shop . I haven't had much luck. I tried the tips for setting up an indoor home studio that I mentioned back in October last week and the week before. I searched for a full-spectrum light bulb. I bought poster board to reflect light back. I tried different ways to diffuse the light. All of that experimenting, and this was the best I could do: I debated whether I should post those on Etsy, and I decided to give it a try. However, the colors are wrong and the earrings are out of focus. They look better in the photos I took before and featured in my October post. Is it the black background? Do I need a different item to diffuse the light? Sooner or later, I hope, I'll get the hang of this. Until then, I have a lot of work to do. We are a participant in the Amazon Services LLC Associates Program, an affiliate advertising pro

Seed beads and my aging eyes

Image
Six or seven years ago, my mom, who does beadwork, too, commented that the size 11 Delica seed beads I like to use were way too small for her to see. She works mostly in seed beads, too, but she sticks with size 10s as much as possible. It made no sense to me that one size would make that big of a difference. But now I get it. The last time I did a marathon of seed beading, I realized that I couldn't see the beads well enough to work if I had my glasses on. It seems my distance vision has gotten bad enough that my glasses are too strong to see tiny items (such as words on a page or seed beads in an earring) very well at all. Because I like to watch TV while I do beadwork, I chose shows that I could mostly listen to. I wore my glasses, but pushed them up on top of my head while I stitched beads together, then dropped them back down on my nose if I thought I needed to watch something on the TV screen. I hope my vision doesn't get much worse than it is now, but I'm

Barrettes make my to-do list

Image
Last weekend, my husband, daughter and I visited a fall festival we had never been to before. We went there not expecting much, but left pleasantly surprised — and $50 or so poorer since we spent money we didn't plan on spending at arts-and-crafts vendor tables. The first thing that caught my eye was a deerskin amulet bag, which I really wanted but it cost more than I could pay (It was worth its price tag, though, just out of my price range). The same vendor also had beaded barrettes, which I've never bothered to make because, in my hair and my daughter's hair at least, barrettes tend to pop out easily. My daughter spotted a pair of pink ones with a feather pattern that she really liked. She likes all things pink. Since they were only $5 for the set, I bought them for her despite my reservations about how well they'd hold. Unlike other barrettes though, these were snug and didn't pop out. They stayed in her hair for the rest of the day. I think it has to do

My husband lends a helping hand for Halloween

Image
I often over estimate how fast I can complete a project ... by a lot. This year, I had plans to make earrings featuring witches and ghosts, too, but by the time I got my pumpkin pattern squared away for Halloween, I had enough spare time to make a couple of pairs of those. I didn't have the time to sketch out a pattern for anything else. I mentioned to my husband that the witch and ghost were on my wish list, so when I was busy with other things, he sat down with some graph paper and chipped in by sketching out a bead pattern for a witch hat and a ghost. Here’s what he drew: Pretty cute, huh? I love them, and while I don’t think I’ll use these patterns exactly, he did give me a starting point for next year. Happy Halloween, everyone! We are a participant in the Amazon Services LLC Associates Program, an affiliate advertising program designed to provide a means for us to earn fees by linking to Amazon.com and affiliated sites.

Photographing beadwork is a tricky task

Image
Teeny, tiny, little shiny seed beads can be so hard to photograph. I know to use the macro setting for small objects. After taking scores of photos by the light of my living room lamp, I've come to realize that taking photos outdoors on a sunny day will result in better, more true color. (If you scroll back through my previous posts and you spot a photo with an orange hue, it was probably shot in my living room.) I've read about, watched videos on and visited web pages that cover framing. And yet somehow, my photos still seem to often be off balance. But I'm a firm believer in the power of practicing tasks you want to get better at doing. So this past Sunday, I hauled a small table out onto my back patio, got a black handkerchief I bought specifically to serve as a background, and tried to get some photos of a pair of feather earrings I made.  Three versions (of many) that I took of feather earrings I made. The two on the left are too blurry. Only the one on the

More pumpkin earrings for Halloween

Image
As my older sister showed me the latest earrings she made, I couldn't help but laugh. Just like me, she had her mind on pumpkins. (And Frankenstein and Dracula, though she hadn't made earrings featuring those creatures yet). Nearly all earrings my sister makes are long, dangling creations in the Native American style,* and she brought that into her Halloween earrings. Here is what they look like: How adorable are those little pumpkin faces at the top? I also love the sparing use of turquoise-colored beads; they seem to be just the right amount of accent for the orange and black. My big sis never ceases to amaze me. After the false starts I wrote about a couple of weeks ago, I decided to nix the idea of using square stitch in my own pumpkin earring creations because it seemed too easy to move the beads out of shape. I think this was likely because I'm not all that skilled at square stitch, since it isn't a stitch I'd used before. However, in the inte

Trial and error: My tale of two pumpkins

Image
Top pumpkin is how I'd sketched it; the bottom one is the first one I made with the increase not where I initially planned for it to be. How much experimenting do you do when you bead? I ask because I generally don't like to do much. I want to know when I start a project what each stitch will be. If I accidentally stray from the original plan, aka make an error, I take out stitches and fix it. And when that's done, I move on to another project. Or that's what I typically do. This past week, armed with a twice-redrawn pattern for pumpkin earrings , I sat down to string it up in square stitch, a method that I haven't used much. In row three, I made an error as I was trying to do an increase, making the increase closer to the edge than I had sketched it to be. In the past, I would've backed up to where I had made the mistake and fixed it, but this time, I was curious about how it would look. Maybe my "mistake" would turn out to be be

Sizing a seed bead project

Image
This past weekend, I took my daughter to visit some of her cousins, and I loaded up my beadwork, planning to make some pumpkin earrings for Halloween. Since I wasn't home and couldn't use my  Beader's Canvas  software, I took graph paper and a pencil to use for mapping out the pumpkin. After about 20 minutes of marking and shifting so that the pumpkin didn't look lopsided, I finally had a jack-o-lantern face I was happy with. Jack-o-lantern sketch for brick stitch. So I started beading in brick stitch. It didn't take me long to realize I'd need to go back to the drawing board, though, as the pumpkin I'd sketched would wind up being way too wide to wear as earrings.  In retrospect, I should've known that having 20 beads across would be too wide, even with seed beads, but at the time, the thought never crossed my mind. That's probably my greatest challenge in working with seed beads — I often over- or underestimate how much space

All eyes on Halloween ...

Image
Black beads ... check. Orange beads ... check. Plethora of projects for Halloween ... eh, I'm working on it. I'd like to make some earrings in the shapes of jack-o-lanterns, witches, and black cats, but I've never made any of those in earring form before. Hopefully, they'll turn out good. I ordered a few tubes of orange beads from Fire Mountain Gems last week, and already got them in the mail Tuesday. I planned to dive right into beading and make the jack-o-lantern earrings first, but my plans for Tuesday went sideways when my sister asked me to take her to the doctor after her blood pressure spiked into a dangerous range (she's doing well now, thankfully).  So now, all I have on my after-work agenda for Wednesday is making the jack-o-lantern earrings. Hopefully, I'm hard at work making the first set as you read this.

My Etsy shop reopens

Image
For the first time in years, I added a listing to my Etsy shop a couple of weeks ago. My uncle has been making flutes for several years now that he sells to gift shops and tourist sites that highlight the Native American culture (he is full-blood Cherokee). He had told me that he was interested in selling them online; and since I have an Etsy shop, I offered to list some for him to see how they did. So a couple of weeks ago, I listed one. He says he has more ready to go, but I haven't had a chance to pick them up from him yet. It won't be the last of the items I list; I want to start listing my own creations -- beadwork and a few baskets once I get better at making them -- between now and Christmastime. In the meantime, if you'd like check out my uncle's flute, you can visit my Etsy shop here .

My old journal and a charcoal pencil

Image
Ten years ago, I took an introductory drawing class with the idea of being able to use the skills later at my job, which called for me to occasionally create a graphic or illustration. I really enjoyed the class, and I learned a lot about creating depth and perspective with shadows. I did some drawing in the months that followed, but eventually, my drawing journal wound up in a drawer amid my craft supplies, and there it's sat for the past eight or nine years. Until this past weekend, that is. An itch to draw again has been following me around over the past few months. I'll see a lamp post or desk or flowers in a vase, and think, "How would I draw that? What would I need to do to show the light? How could I show the reflection on the side?" etc. So on Saturday, I took out my journal, grabbed a charcoal pencil, and attempted to draw my daughter from a photo. I learned two things as I sketched: (1) At the time I drew the stuff that was already in my journal, I

"Pendant Necklaces" full of projects on my "to-try" list

Image
"Pendant Necklaces" by Jerilynn Clements, Nancy Javier and Barbara Finwell While I mostly work in seed beads, I'm looking forward to giving the projects inside "Pendant Necklaces" a try. The book, a Leisure Arts Publication by Jerilyn Clements, Nancy Javier and Barbara Finwall, was another birthday gift from my in-laws. I love the look of every necklace it features and the fact that the book includes some instructions on using polymer clay. I've never tried polymer clay, but it's a medium I've long considered adding to my craft stash. Maybe the Dragonfly project will be what will give me the courage to finally give polymer a try. For now, I'm going to put the book aside while I try out a project from " Elegant Beaded Bags ," but this one is next on my list. Some of the projects look so simple, but they still have a lot of "wow." I'm hoping the book will help jump-start my own creativity, which I feel has been a

"Elegant Beaded Bags" by Sonja Hood

Image
My in-laws sent me a few new beading books for my birthday last month, and I cannot wait to try them out. The first one I want to try out is "Elegant Beaded Bags" by Sonja Hood because features crochet beading, which I've toyed with a time or two, and bags, which I love. (Seriously, I've signed up for magazines I didn't really want just to get a free bag with it.) "Elegant Beaded Bags" by Sonja Hood Each project in the book falls into the "easy" category, which makes it perfect for a bead-crochet novice like myself. I can crochet, but the only crochet projects I've ever completed were blankets. From the first time I saw a bead-crochet bracelet, I've wanted to make one, but for some reason, I find it intimidating. Hopefully, this will be the book that gets me past the skittish stage. I'll update with a craft book review once I have a chance to try it out.

A trip to an art museum

Image
"What We Want, What We Need." Artist Jeffrey Gibson (born 1972) at Crystal Bridges Museum of American Art in Bentonville, Arkansas For the first time since our daughter was born, my husband and I went to an art museum earlier this month, Crystal Bridges Museum of American Art in Arkansas. It was a trip I've wanted to make ever since the museum opened its doors back in 2011. Though the collection was smaller than I thought it would be, the trip still did not disappoint. One of my favorite works was a beaded punching bag sculpture titled "What We Want, What We Need" by Choctaw artist Jeffrey Gibson. According to the Crystal Bridges website , "in this work, seemingly contradictory positions are blended equally and harmoniously, demonstrating Gibson’s philosophy that varied cultural influences generate new ideas and creations." The museum also has on show an exhibit of blown glass by Dale Chihuly, an artist I first learned about while taking

"Star-crossed" idea for the Fourth of July

Image
A few weeks ago, I had an idea for earrings with a Fourth of July theme. If only I had sat down with pen and paper right then and worked out the mechanics of how to make it. Instead, I let a couple of weeks pass, and then finally last weekend, I took out some graph paper and tried to work out the trickiest part: How to make a star look star-ish without making it so big that I can't add the rest of my idea. I figure that at most, the star cannot be bigger than five beads high. However, no matter how I worked it -- brick stitch or square stitch -- my sketches seemed to look more like little aliens that stars. One page of my "star" sketches. So I switched to my Bead Canvas software, and yet again, I wasn't happy with the results. More attempts to make a tiny star. After a few hours of trying to figure it out, I think what I'll need to do is rely on the colors around the stars to make them look as they should, which, for me, will take trial

Changes at the crafts store

Image
It's tough when trends change before you're ready. The problem has affected both my mom and me. First, the local stores stopped carrying the starburst beads Mom likes, and now she cannot find the  spaghetti and rondelles she uses to make headdresses. In the case of the starbursts, she wound up substituting a different bead. For the spaghetti and rondelles, I'm still hoping to find them somewhere online. For me, the issue is mostly about convenience. Not too long ago, I could find Delicas at local retailers. Not anymore. Now if I need a specific color, I have to order it online and wait for it to show up. By then, I may or may not remember the project I had in mind.  I've also had trouble finding items I want, like trays that make toting beadwork easy, and a particular type of big-eye needle. I've found other (though inferior, in my opinion) needles, but no substitute -- good or bad -- for the trays. Should I ever find any of the supplies on M

My daughter's first beaded ring

Image
Kids seed bead rings, made in ladder stitch It took her nearly a month, but my daughter finally finished the ring she began working on back in mid-April. Her beading sessions were short, maybe 20 minutes at a time. And she insisted on having YouTube Kids playing on a smartphone as she worked on it, so because her focus was divided, she managed to complete two to five rows each time she sat down to work on it. But she stuck with it, and got it done. The wires got rumpled, which happened to me when I first started making them, but with more practice, she'll be able to keep that from happening. She also used colors -- a dark blue and dark green -- that were a little too similar. In bright lights, you can tell the differences in the colors, but in lower light, not so much. But to me, it was the most beautiful beaded ring I've ever seen. I just wish I'd taken a photo of it, but now it's too late. I wanted my little girl to feel proud of the work she did, so I to

Another pair of feather earrings ... and a new camera

Image
My latest project is another pair of feather earrings . I really like this pattern, but I'd like to create another one that doesn't look so simplistic. Feather earrings in progress. I've seen some gorgeous ones on Etsy (like these ), and I just think, "Wow! Maybe one day I'll be that creative, too." In the meantime, I've been playing with my new toy -- a Kodak PixPro camera. After six or seven years of solid service, my old camera was on its last leg. My husband, who takes photos of the comic books and action figures, et al, that he sells on eBay , said the old camera still works fine for him, so now its his, and I've moved on. I had a lot of fun testing the new camera's macro function as I took the shot above. I still could use a lot of practice with it, but new toys are always fun.

Mother-daughter beadwork time

Image
Seed bead rings made with wire and Delica beads. Last Sunday, I gave my daughter a quick lesson in making seed-bead rings. She didn't get very far before she wanted to do something else, but since she's just 5 years old, I didn't want to force her to stay with it and make it not fun for her. Well, earlier today, she asked to work on it again. And much to my happy surprise, she started picking up speed. Last week, it took her probably 10 minutes to put 5 seed beads on the wire. Today, she was able to add 5 beads in about 3 minutes. I'm very proud of her. What crafts do you like to do with your children? Let me know in the comments field below.

Pottery wheel practice

Image
My daughter, my niece and I put the pottery wheel my daughter bought back in November to use recently. It was fun, but not as easy as I thought it would be. Going into our afternoon of pottery making, I foolishly thought my daughter and niece would each be able to create their own cup. But I realized after the first 10 minutes of trying to shape the first project that we would have time for only one. Also, the instructions were not as clear as I think they could've been. It would've been nice if they had a diagram noting what each piece was called, and I just wasn't understanding based on the instructions when it would be OK to remove the cup from the encasement. So, our first effort was mostly a trial-and-error project. We didn't bother to smooth out rough edges because I just wanted to test how long it would take the clay to dry and whether it would be OK to wait until it was entirely dry before removing it from the encasement. In short, it's not pretty, bu